I2C Shield for Raspberry Pi 4, Pi 3, & Pi 2 with Outward Facing I2C Port Terminates over HDMI

I2C Shield for Raspberry Pi 3 & Pi2 with Inward Facing I2C Port - store.ncd.io. In our opinion, the only thing the Raspberry Pi 3 and Pi2 are truly lacking is an I2C port. (Of course you may have guessed by looking at our product offeri. Price: USD 11.95
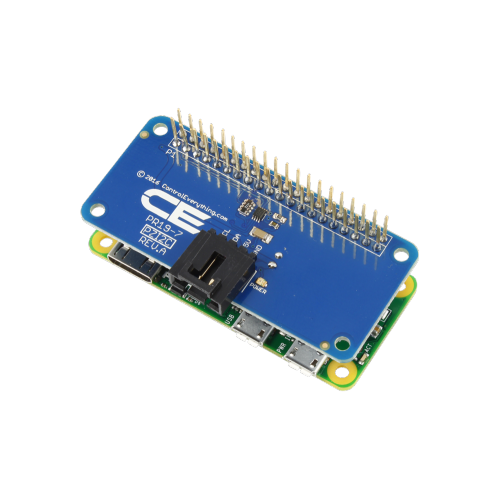
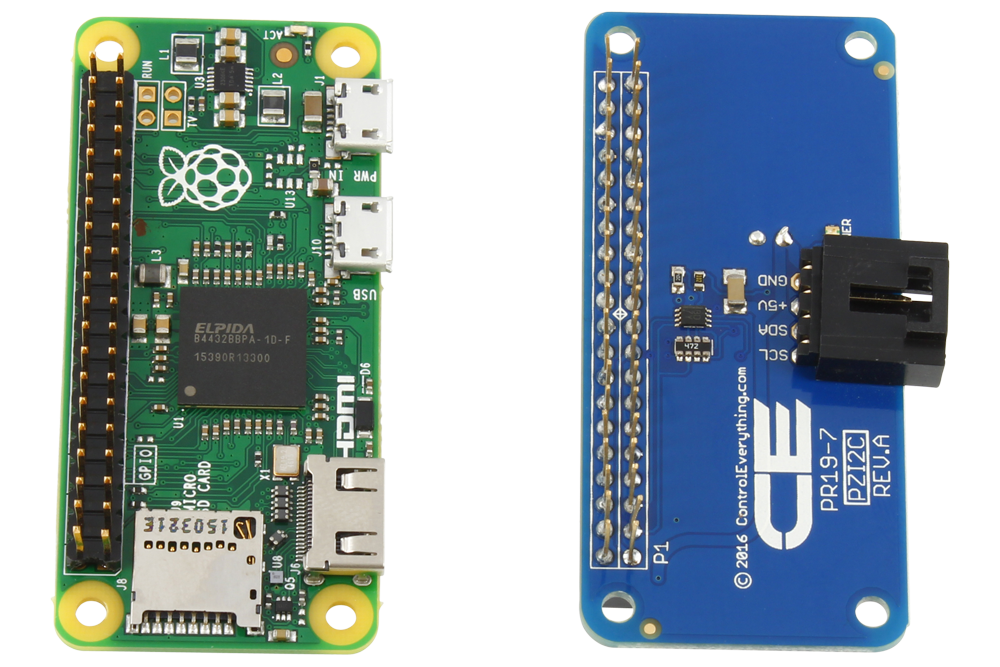
Raspberry Pi Zero Compatible I2C Shield with Key Fob Receiver

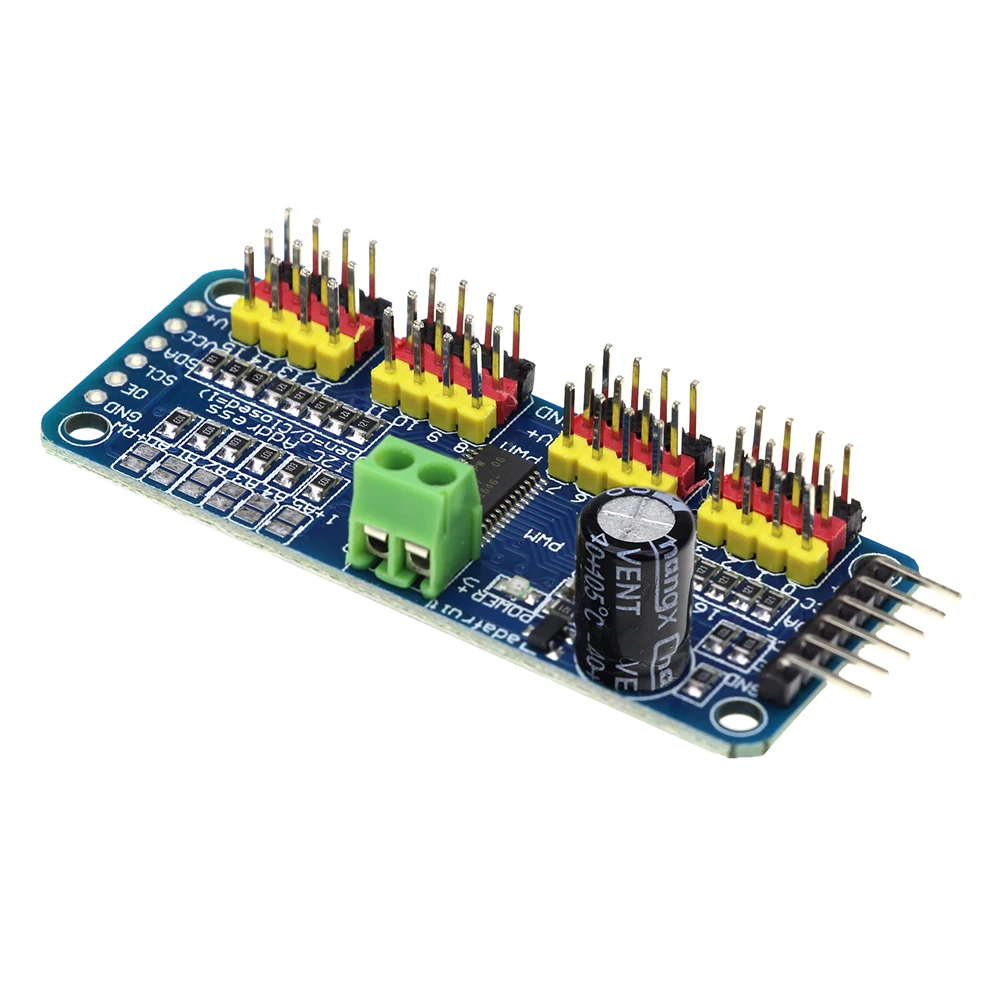
Since the Raspberry Pi does not have a lot of PWM pins, we use a fully-dedicated PWM driver chip onboard to both control motor direction and speed.This chip handles all the motor and speed controls over I2C. Only two GPIO pins (SDA & SCL) are required to drive the multiple motors, and since it's I2C you can also connect any other I2C devices or HATs to the same pins.
I2c Raspberry Pi 3 Python Raspberry

If you have an Original Raspberry Pi (Sold before October 2012) - the I2C is port 0: Download File Copy Code. sudo i2cdetect -y 0 sudo i2cdetect -y 0. If you have a second rev Raspberry Pi, the I2C is on port 1: Download File Copy Code. sudo i2cdetect -y 1 sudo i2cdetect -y 1.
PR22 I2C Shield for Raspberry Pi 3 & Pi2 with Outward Facing I2C Port Not working with RPI 3 b+

The project is successfully completed with Raspberry Pi Pico and I2C - 1602 LCD shield, LED's and Buttons . The I2C - 16x2 LCD shield, LEDs and Buttons can be used for many embedded projects as alpha numerical display, visual indications and feeding user inputs. Step 8: Video Link.
I2C Shield for Raspberry Pi with Inward Facing I2C Port store.ncd.io
Wiring up the I2C LCD 1602 to the GPIO. You will need 4 wires to wire up this component. 5.5, GND, SDA1, and SCL1. These wires should be plugged into the 4 corresponding pins highlighted by the green box below: Now plug the corresponding wires directly into the I2C controller: Pin 4 (5V) connects to VCC. Pin 6 (GND) connects to GND.
I2C Shield for Raspberry Pi Zero with Outward Facing I2C Port at MG Super Labs India
Background & Software Setup. The Raspberry Pi has three types of serial interface on the GPIO header. You're probably already familiar with the UART serial port, which allows you to open a login session from a serial terminal application, such as PuTTY.. The other two serial interfaces are the Serial Peripheral Interface (SPI) and Inter-Integrated-Circuit bus (I2C).
I2C Shield for Raspberry Pi 2, 3 & 4 with Outward Facing I2C and Communications Port NCD Store

For Raspberry Pi 1, Raspberry Pi 2, and Raspberry Pi 3, we recommend the 2.5A micro USB supply. For Raspberry Pi 4 and Raspberry Pi 400, we recommend the 3A USB-C Supply for Raspberry Pi 4. For Raspberry Pi 5, we recommend the 27W USB-C Power Supply. No Raspberry Pi models support USB-PPS.
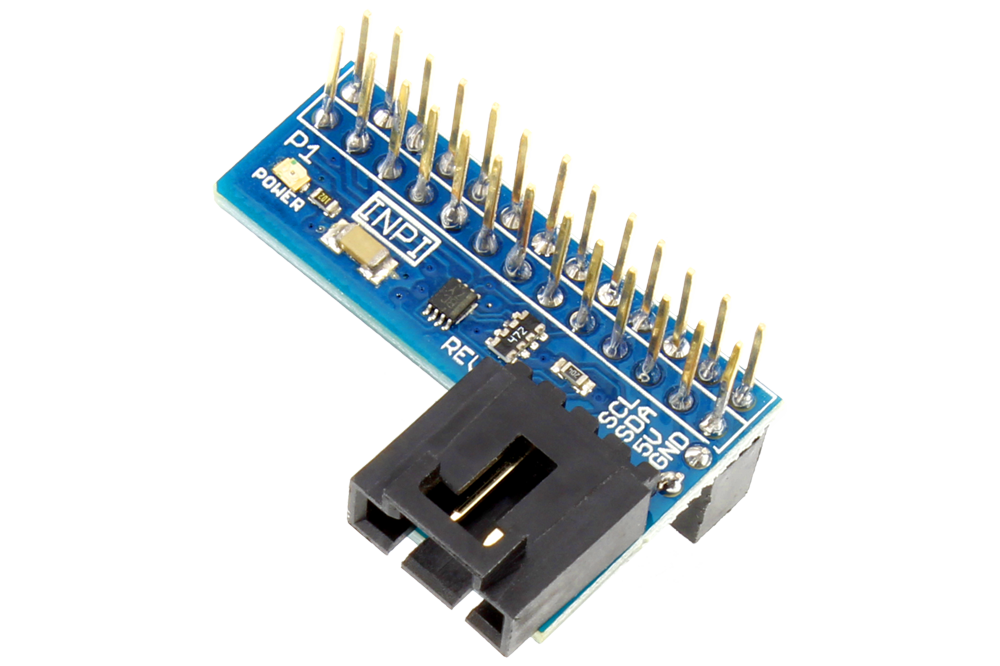
I2C Shield for Raspberry Pi 4, Pi 3, & Pi 2 with Inward Facing I2C Port store.ncd.io

Seeed Grove - Base HAT for Raspberry Pi Zero. £8.50 incl. VAT. Notify me. The Grove I2C Hub is a Grove extension module for connecting multiple I2C devices to a Grove Base Shield. It can be used with a standard Grove cable ( 4-pin to X2 4-pin cable) to connect multiple Grove I2C devices to your project - without the need for multiple.
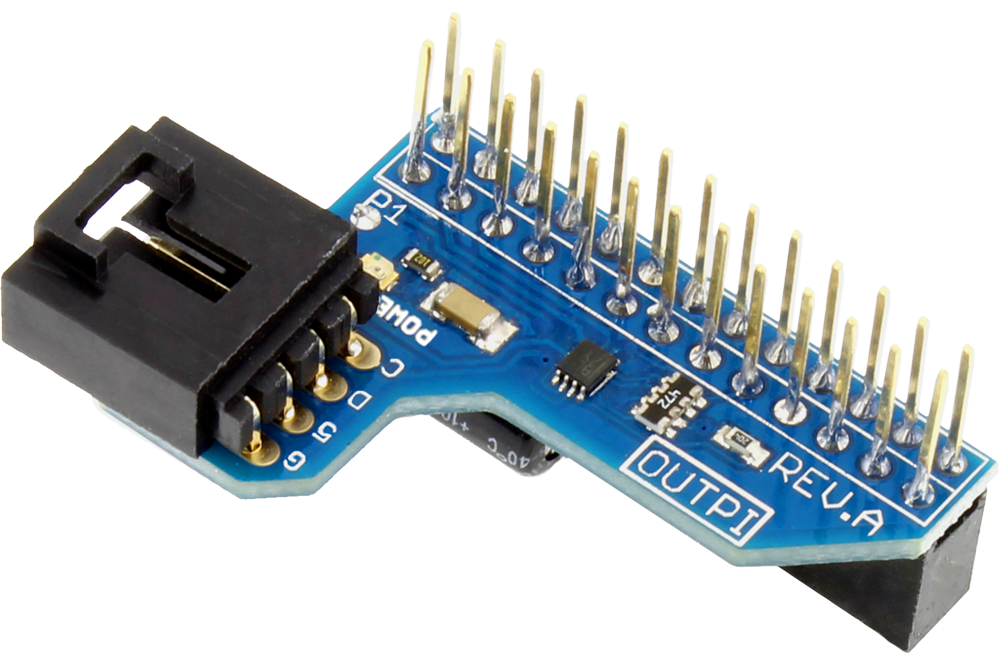
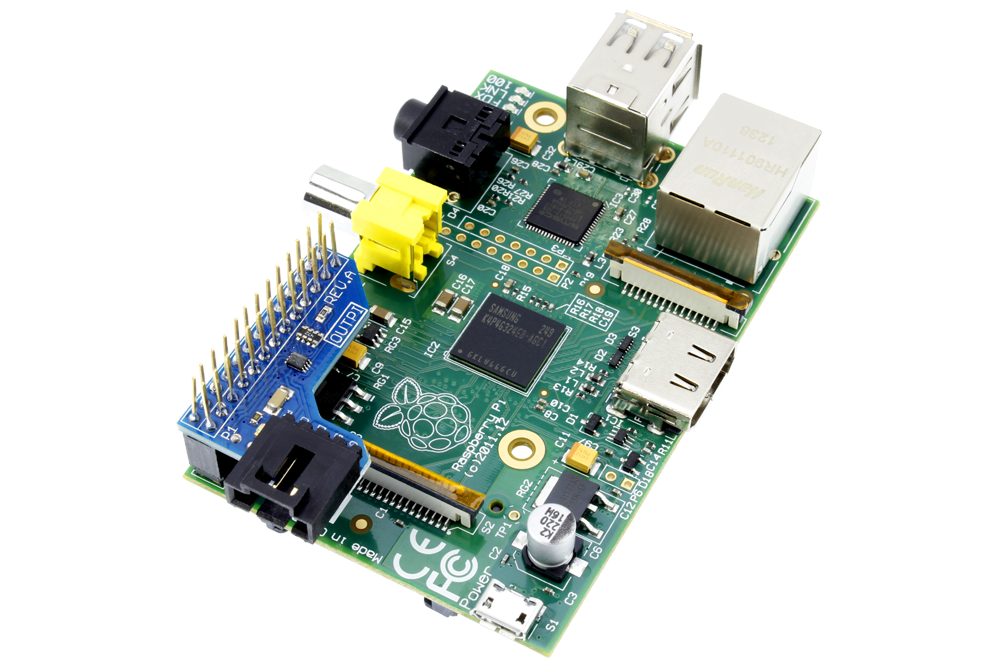
I2C Shield for Raspberry Pi with Outward Facing I2C Port store.ncd.io
The INPI2 is a non-invasive I2C adapter complete with level shifter providing you with a +5V I2C port for use with ANY of our I2C devices. The I2C port points inward minimizing the footprint of the expansion. The INPI2 does NOT consume the 40-pin expansion port, as it is equipped with a pass-through connector, freeing the 40-pin connector for.
I2c Raspberry Pi 3 Python Raspberry

recenelty i purchased a new Pi3 B+ and when i plug the i2c shield, the pi does not boot. if i unplug the i2c shield the pi starts to boot. then i try the same shield on pi 3B and it works without any issue. the pi shield connects to the Pi using these pins 5V, GND,3.3V, SDA and SCL. i have enabled the hardware I2C in the raspi config section.
I2C Shield for Raspberry Pi with Outward Facing I2C Port MG Super Labs
The Raspberry Pi designers swapped over I2C ports between board releases. Just remember: 512M Pi's use i2c port 1, 256M ones use i2c port 0! When you are finished in raspi-config reboot for the i2c modules to automatically load into the kernel. Adafruit Pi Code Configuring SPI .
I2C Shield for Raspberry Pi 4, Pi 3 & Pi 2 with Outward Facing I2C Port store.ncd.io

Earlier Mega's have the I2C pins in a different location and will require you to solder two wires from the I2C pins on the shield and plug them into the different I2C locations at Digital 20 & 21.. Adafruit Blue&White 16x2 LCD+Keypad Kit for Raspberry Pi. 3x4 Matrix Keypad. 4x4 Matrix Keypad. MCP23008 - i2c 8 input/output port expander.
PCA9685 16 Channel 12bit PWM/Servo DriverI2C Interface Module For Raspberry Pi Shield Module
Reboot your Raspberry Pi followed by the steps below to install the prerequisite software and drivers. Step 1: Reboot the Raspberry Pi using following command. sudo reboot. Step 2: Next you need to update your Raspberry Pi to ensure all the latest packages are installed: sudo apt-get update sudo apt-get upgrade sudo apt-get dist-upgrade
Raspberry Pi 2 & 3 Compatible I2C Shield with RFID Receiver

The circuit is designed around the MCP23017 integrated circuit, from Microchip, offering 16 inputs / outputs that can be driven through the I2C bus. In this way, we can drive the eight inputs and eight digital outputs of our shield engaging the only two pins of the Raspberry Pi connector headed to the I2C bus.
I2C Shield for Raspberry Pi Zero with Outward Facing I2C Port store.ncd.io
Every device on an I2C bus must have a unique address. You have a number of options. use an I2C multiplexor between the devices and the bus. It acts as a gatekeeper allowing multiple devices with the same address to be used on the bus. E.g. the TCA9548A. use a bit banged I2C bus for one device and use the hardware I2C bus for another.
Raspberry Pi Pico I2C LCD Shield (16x2), LED and Push Button Interface 8 Steps Instructables

In the diagram above, the blue wire connects to the Raspberry Pi's SDA pin. The yellow wire connects to the Pi's SCL pin. Enable I2C on the Pi. Before we get into the programming, we need to make sure the I2C module is enabled on the Pi and install a couple tools that will make it easier to use I2C. Enable I2C in raspi-config